Connect Your Business Application to Smartsheet with Unite
- Dan Morales
- Oct 17, 2024
- 2 min read

Updated: 2 days ago
This is the first article in our Unite onboarding series. In this guide, you’ll walk through the initial setup steps to access Unite, connect your Smartsheet account, and authorize your external system—whether it’s Azure DevOps, QuickBooks Online, Sage Intacct, ServiceNow, Workday, HubSpot, and many other supported integrations linked here. Getting connected takes just a couple of minutes and unlocks the ability to build powerful, integrated workflows across your tech stack. Once you’re connected, continue to the next guide to learn how to create your first workflow.
Step 1: Access the SoftwareX Application
Visit our website: thesoftwarex.com
In the top right corner, click the Login button.

Step 2: Sign In with Smartsheet
On the SoftwareX login screen, click Sign in with Smartsheet. There’s no need to create a new account—just log in using your existing Smartsheet credentials.
You’ll be asked to allow access to your Smartsheet account. This step ensures the connector can sync data with existing sheets you have appropriate permissions to edit or administrate along with create new ones if you are a licensed user.


Step 3: Access Unite
After logging in, you’ll see a logo for each product available in the SoftwareX app.
Click Unite which is the hub for all of our Smartsheet Connectors.

Step 4: Select Your System
Browse or search for your desired Connector and click the icon.

Step 5: Sign into Your Account
You’ll be prompted to log in to the system you chose to integrate with (e.g., QuickBooks Online, Azure DevOps).
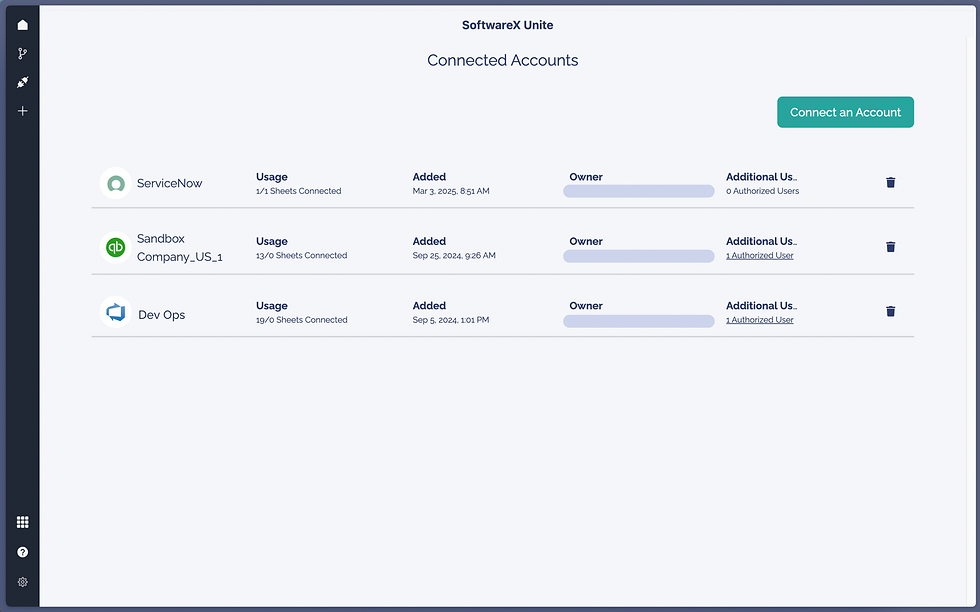
Enter your credentials to allow the connector to access the data you have permission to view and edit in that system. Upon successfully connecting you should see these connecting details:
Application logo
Connection Name
Usage (number of integrated sheets configured)
Date Added
Connection Owner
Additional Users (premium feature)
Options to rename or delete connection
Step 6: Build Your Workflow
Once your account is connected, you’ll be taken to the account screen within the SoftwareX connector app. From here, you can start building your integration workflow.
To create a workflow, click the ➕ button on the left-hand rail of the app and follow the prompts to either sync with an existing Smartsheet sheet or create a new one.
Continue to the next guide to learn how to create your first workflow.
NOTE: Free trial accounts include access to one workflow and one connected account—specifically for testing core functionality. To unlock advanced features and build full-scale integrations, a premium plan is required.
And that’s it! You’re now ready to start using the SoftwareX connector to integrate Smartsheet with your chosen system.

Commenti